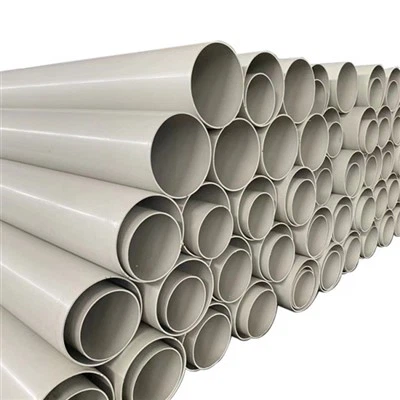
How to Replace a Damaged PPH Pipe Cap?
As a PPH Pipe Cap supplier, I've witnessed firsthand the importance of maintaining and replacing damaged pipe caps in various industrial and plumbing applications. PPH (Polypropylene Homopolymer) pipe caps are crucial components in piping systems, providing a seal at the end of pipes to prevent leaks and protect the contents within. In this blog, I'll guide you through the process of replacing a damaged PPH Pipe Cap, ensuring a safe and efficient repair.


Step 1: Gather the Necessary Tools and Materials
Before you start the replacement process, it's essential to gather all the tools and materials you'll need. Here's a list of items you should have on hand:
- New PPH Pipe Cap: Ensure that the new cap is the correct size and type for your pipe. You can find a variety of PPH Pipe Caps in our inventory, designed to fit different pipe diameters and applications.
- Pipe Cutter: A sharp pipe cutter will be used to remove the damaged cap. Make sure it's suitable for cutting PPH pipes.
- Deburring Tool: This tool is used to smooth the edges of the pipe after cutting, preventing any rough edges that could cause leaks.
- Cleaning Cloth: Use a clean cloth to wipe the pipe and the new cap before installation.
- Adhesive (if required): Some PPH pipe caps may require adhesive for a secure fit. Check the manufacturer's instructions to see if adhesive is necessary.
Step 2: Shut Off the Water Supply
If the pipe is part of a water system, it's crucial to shut off the water supply before starting the replacement. This will prevent any water from flowing out during the repair process and minimize the risk of water damage. Locate the main water valve and turn it off.
Step 3: Remove the Damaged PPH Pipe Cap
Using the pipe cutter, carefully cut the damaged cap off the pipe. Make sure to cut as close to the cap as possible to minimize the amount of pipe that needs to be removed. Once the cap is removed, use the deburring tool to smooth the edges of the pipe.
Step 4: Clean the Pipe and the New Cap
Before installing the new cap, it's important to clean the pipe and the cap to ensure a proper seal. Use a cleaning cloth to wipe away any dirt, debris, or moisture from the pipe and the cap. Make sure the surfaces are dry before proceeding.
Step 5: Install the New PPH Pipe Cap
If the new cap requires adhesive, apply a thin layer of adhesive to the inside of the cap and the end of the pipe. Carefully slide the cap onto the pipe, making sure it fits snugly. If the cap doesn't require adhesive, simply slide it onto the pipe until it's fully seated.
Step 6: Check for Leaks
Once the new cap is installed, turn on the water supply and check for any leaks. If you notice any leaks, tighten the cap or apply additional adhesive if necessary. Make sure to check the connections thoroughly to ensure a watertight seal.
Step 7: Inspect the Piping System
After replacing the damaged cap, it's a good idea to inspect the entire piping system for any other signs of damage or wear. Look for any cracks, leaks, or loose connections. If you notice any issues, address them promptly to prevent further damage.
Additional Considerations
- Compatibility: Make sure the new PPH Pipe Cap is compatible with the existing piping system. Different pipes may require different types of caps, so it's important to choose the right one for your application.
- Safety: When working with pipes and tools, it's important to wear appropriate safety gear, such as gloves and safety glasses. Follow all safety guidelines and procedures to prevent accidents and injuries.
- Maintenance: Regular maintenance of your piping system can help prevent damage to the pipe caps and other components. Inspect the pipes regularly for any signs of wear or damage and replace any worn or damaged parts as needed.
Related Products
In addition to PPH Pipe Caps, we also offer a wide range of other PPH pipe fittings, including PPH Elbow, PPH Backing Ring, and PPH 90 Degree Elbow. These fittings are designed to provide a secure and reliable connection between pipes, ensuring the efficient operation of your piping system.
Contact Us for Purchasing
If you're in need of PPH Pipe Caps or other PPH pipe fittings, we're here to help. Our team of experts can assist you in selecting the right products for your application and provide you with the best possible service. Contact us today to discuss your requirements and start the purchasing process.
References
- "PPH Pipe Fittings Installation Guide," Manufacturer's Manual
- "Plumbing Maintenance Best Practices," Industry Publication